|
|
|
Detailed installation instructionsInstalling EOS UtilityEosAutoShooter needs the CANON software “EOS Utility”. So you must
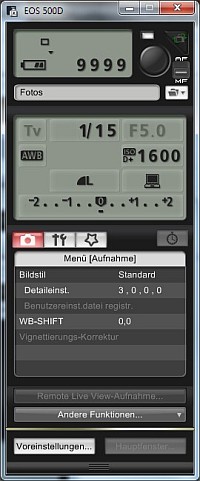
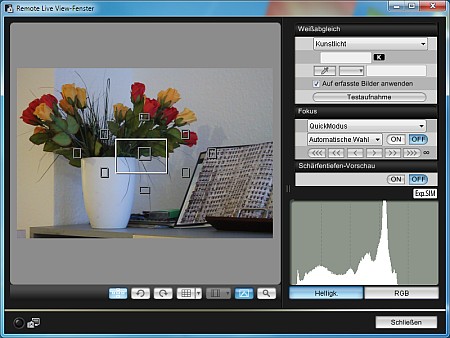
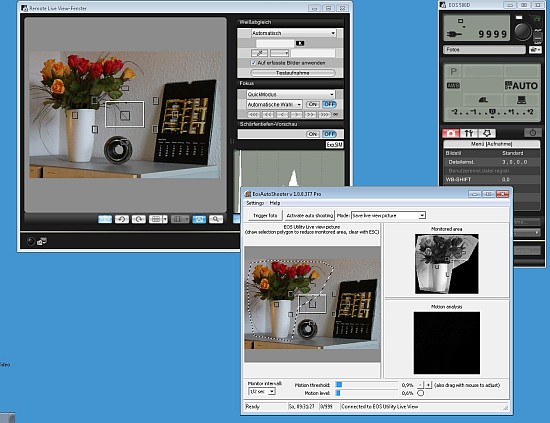
In Live view mode EOS Utility displays two windows: “Remote Control window” (left) and “Remote Live View window” (right):
The Remote Control window is shows the type of the connected camera (here: “EOS 500D”). Installation of EosAutoShooterEosAutoShooter is installed like most other programs. Execute the file “EosAutoShooter.msi”. You see a new icon on your desktop then. First startUsing EosAutoShooter and EOS Utility is pretty straightforward, but a full checklist may be of some use: 1) Setup your EOS-camera: 2) Connect the CANON EOS over USB to your PC.
3) Start EOS Utility, choose “Camera Settings/Remote shooting” and then “Live View shoot” .
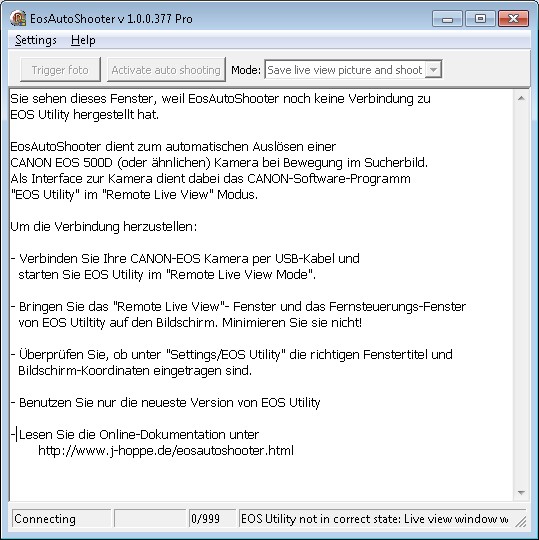
4) Align the camera, setup zoom factor and focus.. 5) Start EosAutoShooter. EosAutoShooter displays at first it’s main window with a help text.
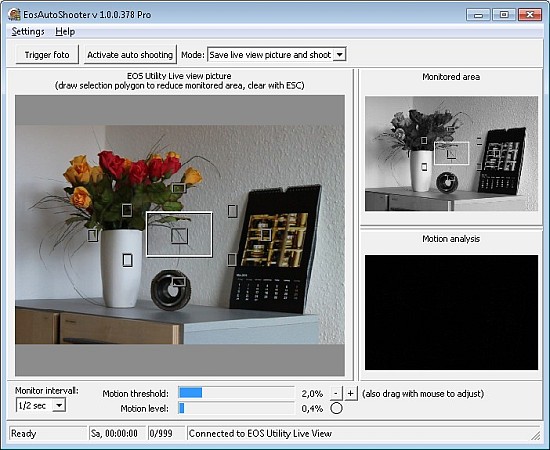
Then it searches the desktop for EOS Utility windows and locates the Remote Live View window and the shutter button. If a connection to “EOS Utility“ is established, the help text will disappear and the normal user interface together with a copy of the Remote Live View picture appears.
6) Attention: Arrange EOS Utility and EosAutoShooter on the desktop in a non-overlapping way.The Remote Live View picture must not be hidden, and you should see the full EosAutoShooter windows.
7) In EosAutoShooter, set “mode” to “Shoot with camera” and click the “Trigger photo” button. Then these action are taken:
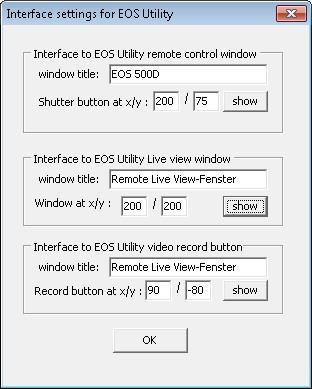
Setup with menu item "Settings/EOS Utility"EosAutoShooter searches those two EOS Utility windows “Remote Control Window” and “Remote by their window titles. The Position of the actual Live View picture and the shutter button within these windows is then adjusted by giving x/y-coordinate pairs. for each. Window titles and coordinates can be changed over menu item “Settings/EOS Utiltiy”.
The Remote-Control-Window displays the type of your camera (here: “EOS 500D”) in its title bar. So you must enter the type of your camera under “Interface to EOS Utility remote control window/window title:”, exactly as EOS Utility displays it. The menu item “Settings/camera” typ is just a convenient way to do this. Settings for x/y position of windows and other controls must only be changed if
The x/y coordinate pairs are interpreted as follows:
Adapt EosAutoShooter to other programsYou can set window titles and coordinates for viewfinder image and trigger button whitout restrictions. This enables EosAutoShooter to control other progranms than EOS Utility. It is even possible to have the Live View picture in one Windows program and the “trigger button” in another. So EosAutoShooter can be used in every “watch-and-click-on-motion” application. Of course this includes controlling remote control programs for other DSLR manufacturers. You can also trigger CANON DSLR’s without the Live View feature on motion: Buy a webcam, and set up EosAutoShooter to use the webcam’s live image to monitor for motion.
|
| [EosAutoShooter english] [Download & Purchase] [Quick guide] [Installation] [User interface] |
